How to Set Up Facebook Domain Verification
2 min to read ✭ In this post, you'll learn how to verify your domain on Facebook and why it's important.
Why Facebook Domain Verification is Important
With Facebook’s recent updates and changes, there are steps you need to take to continue running Facebook ads and have proper tracking. The most important being verifying your domain.
Domain verification is required in order to configure your Aggregated Events Measurement.
When you verify your domain with Facebook, you are claiming ownership. You will need admin backend access to your website to set this up.
Domain Verification Set Up
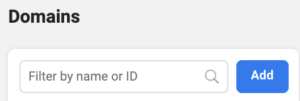
To set up verification, go to your Facebook Business Manager and into your Business Settings. On the left side click on “Brand Safety” and select “Domains.”
Click “Add” and enter the domain you would like to claim. Press “Add Domain.”
There are three ways that you can verify your domain.
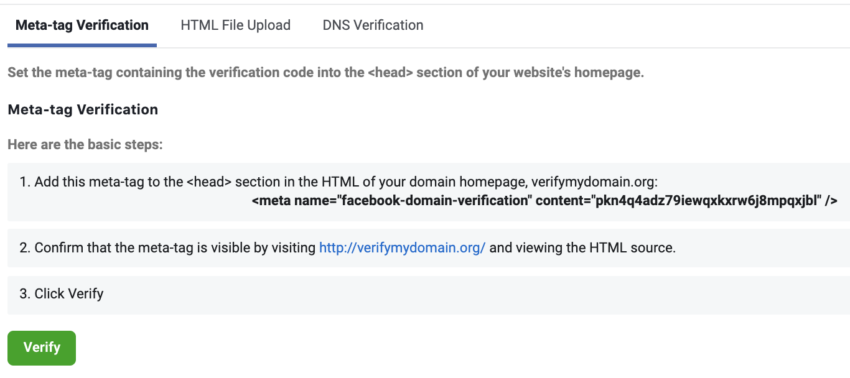
1. Meta-Tag Verification
Facebook will automatically populate a specific meta-tag for your domain once you begin verification. This process is the simplest, especially if you’re familiar with placing Google Tag Manager. Copy the meta-tag and paste it in the <head> section of your website HTML. Once it’s placed, come back to your Business Settings and press “Verify.”
2. HTML File Upload
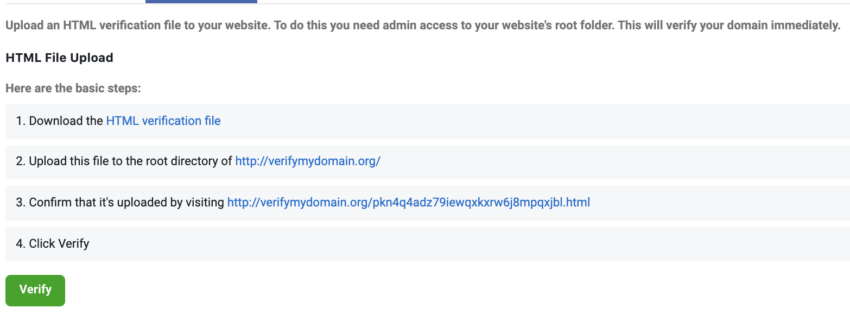
The second option is to upload an HTML verification file to your website. You will need admin access to your website’s root folder in order to do this. If this doesn’t make sense to you, we would recommend the first option!
3. DNS Verification
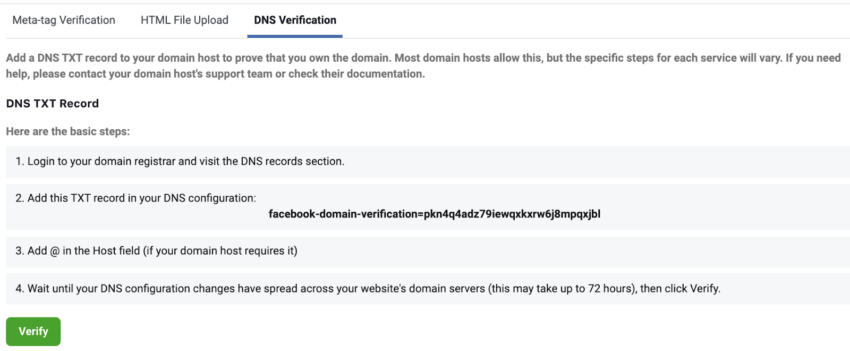
Login to your domain registrar and add a DNS TXT record to your domain host. If these steps don’t match up with your domain host, you will need to contact your domain host’s support team. This option can take up to 72 hours before you are able to Verify.
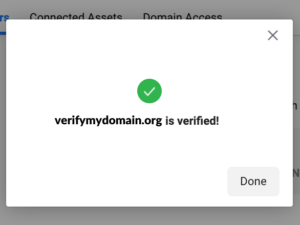
Once you place the Meta-tag, upload the HTML verification file or add a DNS TXT record, be sure to go back to your Business Settings and press “Verify.” You should see a pop-up confirming that your domain is verified like the example below.
Need Help With Your Nonprofit’s Facebook Strategy? Speak With Our Team of Experts!
Connect Your Assets
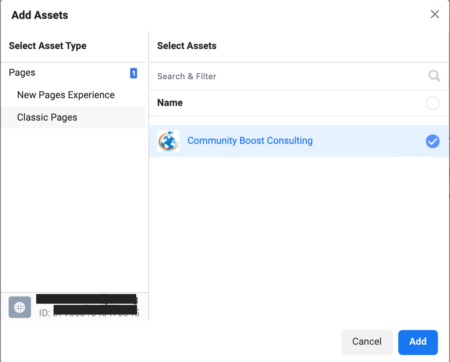
Once your domain is verified, you will need to connect your Facebook Page.
Click “Connected Assets” and press “Add Assets.”
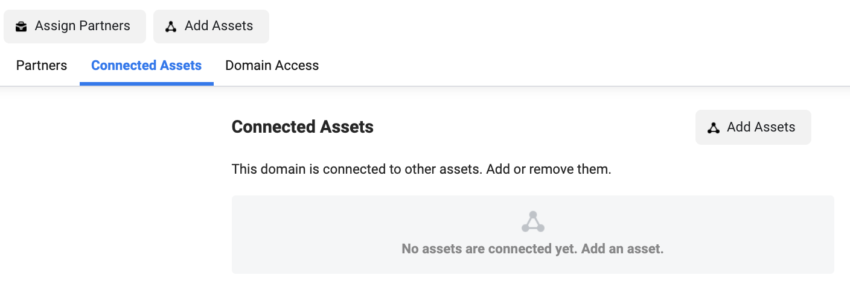
Select your Facebook Page and press Add.
Subdomains do not need to be verified separately, but if you have multiple domains that are not subdomains, they will also need to be verified!
For example, if you verified domain.org, you do not need to verify shop.domain.org, but you will need to verify domain.org.tr.
Share Domains with a Business Partner
A single domain can only be verified by one Business Manager, but a single Business Manager can verify multiple domains.
If you work with a partner or an advertising agency, you can share your domain across Business Managers.
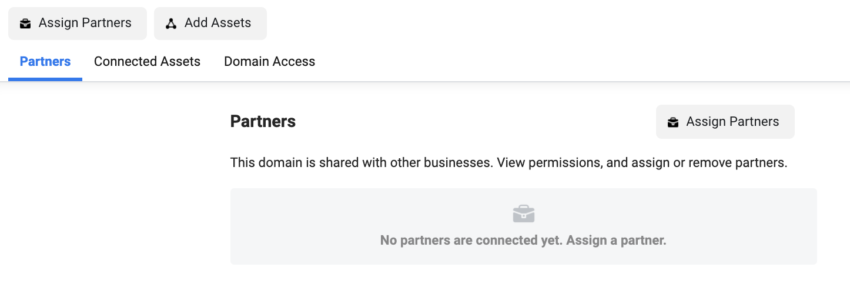
Select “Assign Partners” from your domain and enter your Partner’s Business ID. Press Next and your partner will have access to your domain.
Once you’ve verified your domain and added your Facebook page, you can configure your Aggregated Events.