How to Set Up Facebook Standard Events and Aggregated Event Measurement
4 min to read ✭ In this post, you'll learn how to set up Standard Events and Aggregated Events in the Facebook Pixel.
Now that you’ve implemented the Facebook Pixel, you can discover how to set up Standard Events to better track and understand the actions taken from your Facebook ads. If you haven’t placed the Pageview Pixel yet, check out our post on how to set up the Facebook Pixel. Once you set up Standard Events, you will also need to configure Aggregated Event Measurement.
What are Facebook Standard Events?
Standard Events are predefined actions that Facebook recognizes across different websites. Standard Events can track when someone completes a purchase or donation on your website, when someone enters the checkout process, signs up for a newsletter or form on your website, and many more actions.
When you set up these Standard Events you can optimize for your organization’s specific goals, retarget users that have performed these actions, and build lookalike audiences from these events.
You can set up Standard Events on specific button clicks or URLs in Facebook.
What is Aggregated Event Measurement?
*Please note that your domain needs to be verified in order to configure Aggregated Event Measurement and properly track events.
Facebook’s Aggregated Event Measurement protocol will allow you to receive data from your events following Apple’s recent iOS 14 update.
Aggregated Event Measurement limits domains to eight conversion events that can be used for conversion optimization. Those eight conversion events can come from one Facebook pixel or multiple pixels, but you cannot have more than eight events for a single domain.
For example, if Community Boost has three pixels, let’s say Pixel A, Pixel B, and Pixel C, then Community Boost would need to choose which eight events to include in the event configuration between the three pixels. If Pixel A has a purchase event, Pixel B has a purchase event, and Pixel C has a purchase event, that would count as 3 of the 8 events.
After the events are chosen, they need to be prioritized in the Aggregated Event Measurement.
How to Set Up Facebook Standard Events
To get started, you’ll want to confirm that the Facebook Pixel is on your website. To check you’ve installed the pixel correctly, you can download the Facebook Pixel Helper tool Google Chrome extension. Once it’s installed, click the Facebook Pixel Helper from your toolbar when you’re on the website. The Pixel ID should match the one in your Ads Manager.
Step 1
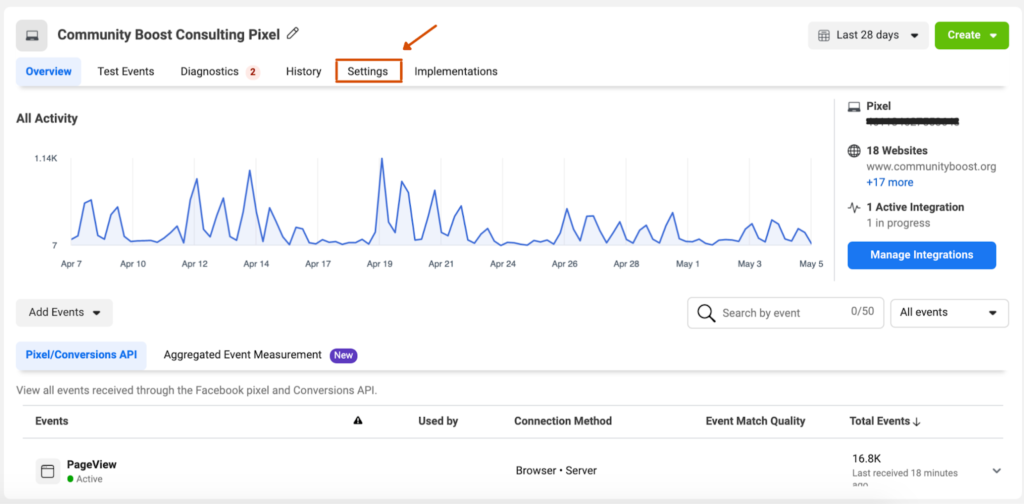
Open Events Manager from your Business Manager sidebar. When your Pixel is selected in Events Manager, select “Settings.”
Step 2
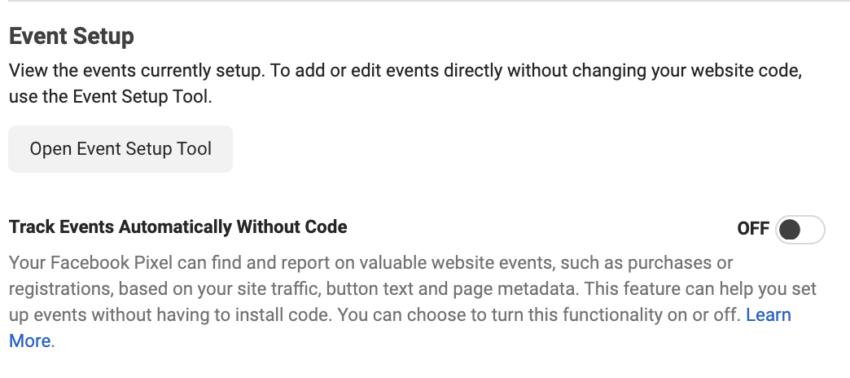
Scroll down to the Event Setup section in Settings and make sure “Track Events Automatically Without Code” is turned off.
Step 3
Click “Open Event Setup Tool” and enter your website’s URL. When your page opens, there will be a pop-up box labeled “Facebook Event Setup Tool.”
Step 4
You can set up tracking on specific button clicks, as well as specific URLs.
Button Click: Locate the button you’d like to track on your website and press “Track New Button.” Anything that is trackable will be highlighted by the tool.
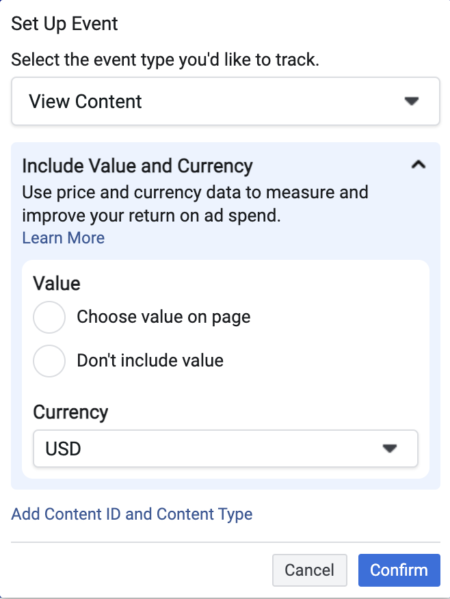
Click on the button you’d like to track and select the event type you would like to track. If it is a newsletter signup, you might want to track “Lead.” If it’s a contact form to submit, “Contact” is a good option. Choose the best event type based on the action you are performing.
If your event has value, select “Choose Value” and select it from the page. If not, click “Don’t Include Value” and then “Confirm.”
Specific URL: If you’d like to track when someone lands on a specific URL, such as a thank you page, go to the specific URL you would like to track. You can do this by going through the process on the page you are currently on until you are on the desired page, or you can close the event setup tool and re-open it following Step 3 and enter the URL you’d like to track.
Once you’re on the URL you’d like to set up an event on, click “Track a URL”. Choose whether you want to track the full URL or just a portion that contains a specific word. For example, if you’re tracking a thank you page, you will most likely want to choose the option that “URL contains” if the full thank you URL will be different for each user.
Select the event type you would like to track. If your event has value, select “Choose Value” and select it from the page. If not, click “Don’t Include Value” and then “Confirm.”
Step 5
Once you’ve set up the button or URL you’d like to track, click “Finish Setup” on the top right side of the Event Setup Tool popup on your website.
Step 6
Double-check the event types you’ve set up, and if it looks good, click “Finish.” The website page will close and take you back to the Events Manager.
Step 7
From the Events Manager, select the “Test Events” tab.
Step 8
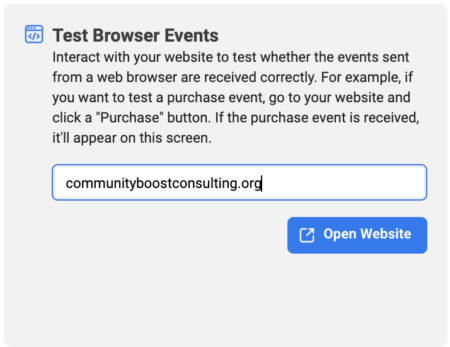
Enter your website URL and press “Open Website.” Your page will open like normal in a new tab. Go back to the Events Manager tab and make sure that Pageview fired when your website opened.
Step 9
Events Manager will update as you interact with your page, and show you which events are firing from the Pixel. On your website, complete the actions that you previously set up tracking for and make sure that they show up in Events Manager.
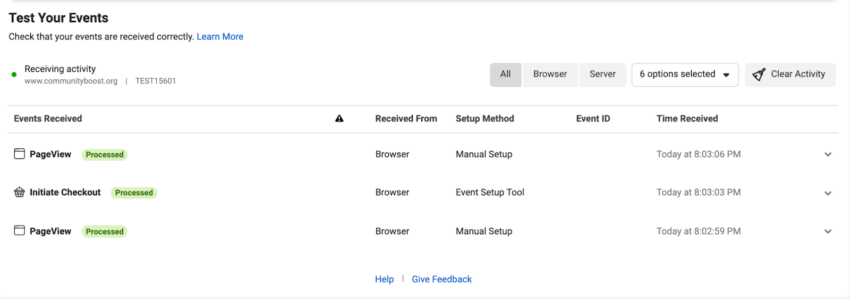
If your events show up here, then you have correctly set up your standard events! Next, you will want to configure Aggregated Event Measurement before you begin running any campaigns.
How to Configure Aggregated Event Measurement
Step 1
From Events Manager, scroll down to Aggregated Event Measurement from the overview section.
Step 2
Select the Aggregated Event Measurement tab and press Configure Web Events.
Step 3
Your domain MUST be verified to continue setting up Aggregated Event Measurement. If you are having trouble with verification, learn how to resolve the aggregated event measurement issue in the Facebook Pixel.
Step 4
Select your domain and click “Manage Events.”
Step 5
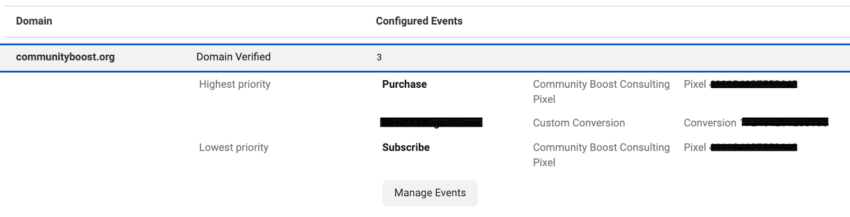
Select all of your events and arrange them in your desired priority level.
If your priority of events is as follows:
- Purchase
- Lead
- Contact
And a user ends up completing all three of these actions, only your top priority event will show data (Purchase). This is why the prioritization of events is extremely important.
Step 6
Press “Submit” and save your Aggregated Events.
Once you’ve set up your Standard Events and configured them in Aggregated Events Measurement, you can begin optimizing your campaigns and better understand the actions people take on your Facebook ads. As you implement new Standard Events, always make sure to add them to the Aggregated Events Measurement before running any conversion campaigns optimizing for new events.