How to Set Up the Facebook Conversions API
5 min to read ✭ In this post, you'll learn how to set up the Facebook Conversions API to continue collecting valuable data that will be blocked by the effects of the iOS 14 update on the Facebook pixel.
Facebook is one of the most popular social media platforms to date and it’s also one of the greatest marketing solutions mankind has experienced. With so many data privacy laws coming into effect, it is only a matter of time before 3rd party data becomes obsolete. One of the things starting to affect Facebook’s targeting algorithm is the update of iOS 14 which will take effect at the end of April 2021. However, Facebook has decided to fight back by introducing us to their conversions API (CAPI).
Facebook’s Conversion API is a response to the growing concerns from advertisers. Their concerns are about losing vital advertising data that they rely on to measure ad effectiveness and to optimize digital campaigns. So what is the Conversion API, also known as CAPI? It is a way to send data from your webserver to Facebook’s server to report on conversions. It prevents advertisers from losing out on data collection that is blocked by the browser and affects the Facebook pixel.
Below is our step-by-step guide on setting up your conversions API.

Set Up Google Analytics 4
- Set up Google Analytics 4 property here
- In your GA4 Property, set up data stream(s) for the website(s) you want to track
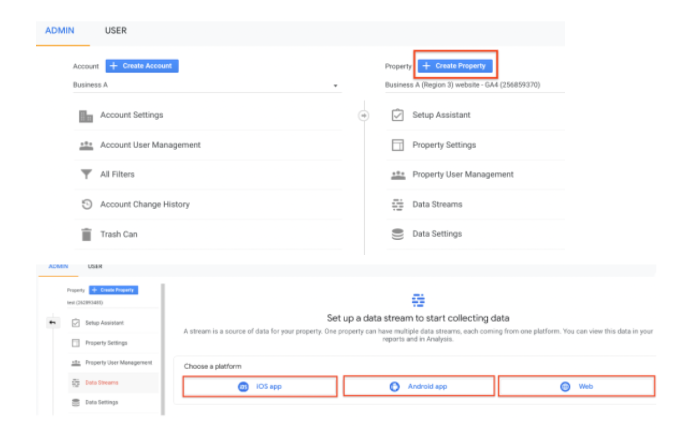
- In each of your data streams, make sure the toggle button for ‘Enhanced measurements’ is turned off otherwise Google Tag Manager will send automatically collected events to Facebook
- Sign in to Google Analytics
- Click Admin, and navigate to the property you want to edit.
- In the PROPERTY column, click Data Streams > Web.
- Under ENHANCED MEASUREMENT, turn off the switch to disable all options.
Click the settings wheel to edit individual options later if necessary.
Set Up a Google Tag Manager Server Container
- Create a new Google Tag Manager Server container
- Configure a GA4 Client:
- Every GTM Server-side container comes with a default GA4 Client for listening to events configured from their GA4 Web Tag. The client listens to /g/collect route on your tagging server URL and sends the event Model to the downstream tag.
- Generate an API Token from your Facebook Business Manager
- Create a ‘Constant’ variable in your GTM Server Container to use in your ‘Facebook Conversions API Tag’ later
- Copy your Facebook Pixel ID from your Facebook Business Manager account and create a ‘Constant’ variable in your GTM Server Container to use in your ‘Facebook Conversions API Tag’ later
- Copy your Test ID from your Facebook Business Manager and create a ‘Constant’ variable in your GTM Server Container to use in your ‘Facebook Conversions API Tag’ later
In your server container, create a new Tag and select the ‘Facebook Conversions API Tag’ and plug in your API Token, Facebook Pixel ID, and Facebook Test Code variables
Set Up a Google Tag Manager Web Container
- Create a new Google Tag Manager Web container
- We want to have a new Google Tag Manager container so that it isn’t cluttered. The CAPI Template in the Server-Side container automatically picks up event data sent from GA4, so it will collect any events you have set up in your Web Container
- In your new Web Container, create a GA4 Configuration tag that fires on all pages.
- Next, configure your web container to send your website data to the created server; set your ‘transport_url’ Field to the Tagging Server URL.
- Configure your Tag and Trigger to track the event that you want to set up conversion tracking for
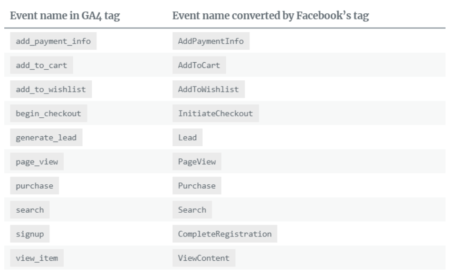
- Be sure to follow the naming convention for GA4 events so the Facebook Server-side tag can automatically pick up the corresponding Facebook Event. List of events
- Configure your GA4 event tag to pass the correct Parameters – such as email, first name, last name:
- To pass the user_data parameters to the Server-side GTM, you must set the ‘first_party_collection’ flag to true.
- Map each of the parameters you want to configure. The variable name has to be read from the event using the common event data schema.
- Be sure to follow the naming convention for GA4 events so the Facebook Server-side tag can automatically pick up the corresponding Facebook Event. List of events
- Test your event!
- Test the event through GTM
- Test through Facebook’s test events
Generate a Facebook Access Token for Conversion API
There are three steps that are needed to successfully generate your Facebook access token and to export your conversion API into Google Tag Manager.
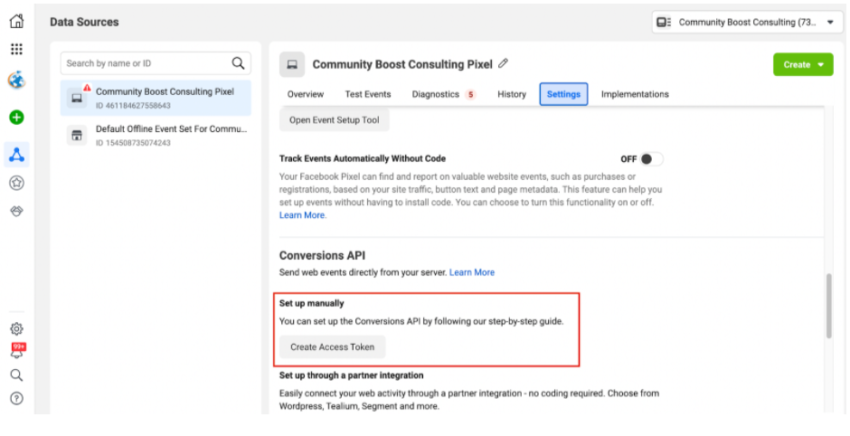
- Head over to your Events Manager and select “Settings” located on the right-hand side.
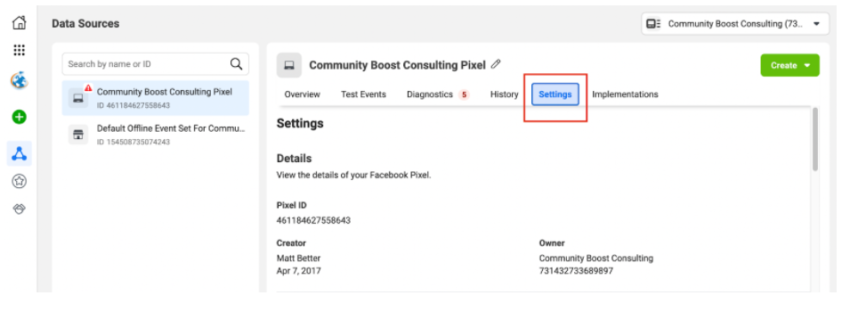
- Next, you will want to scroll down to the Conversion API section and select “Set Up Manually”
FB CAPI set up manually - Once selected you will be prompted to select your pixel. Make sure to select the active pixel that is firing on your website. Once you have selected the right pixel click “Next.”
- You will then be prompted to this screen.
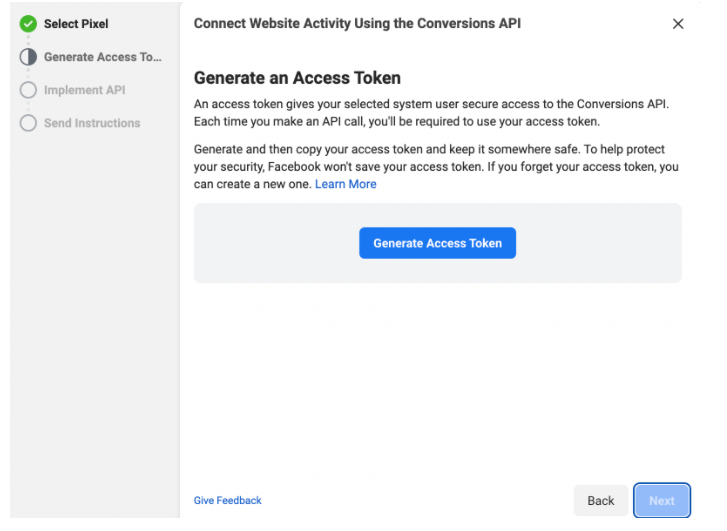
- If you are seeing the above screen please go ahead and “Generate Access Token.”
- Once your token has been generated be sure to select and copy it. (Please refer to step 4 in GTM server Container section)
- If you have already generated an access token then you will need to click on “implementation” on the right-hand side of your Events Manager screen.
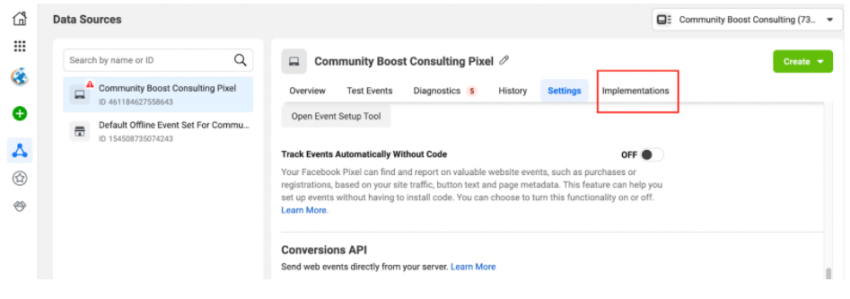
- If you have already generated an access token then you will need to click on “implementation” on the right-hand side of your Events Manager screen.
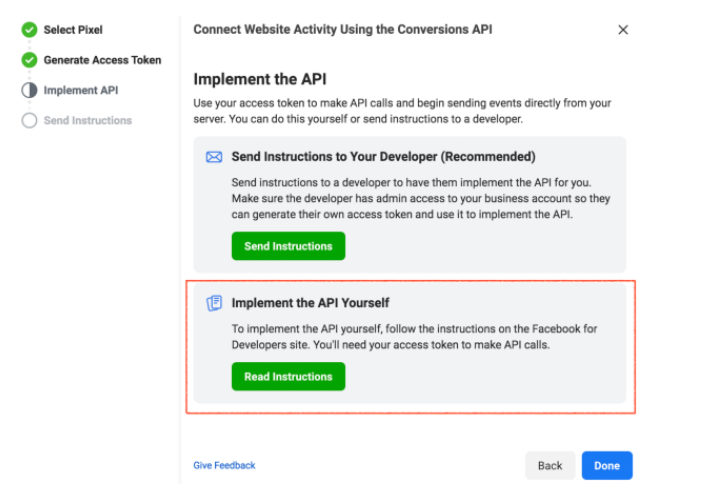
- Once you have selected implementations you can go ahead and select “Get Started”
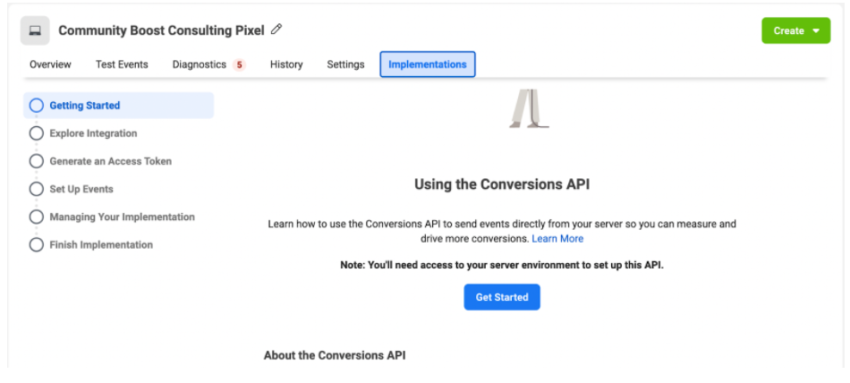
- Once you have selected your access token be sure to select “Implement the API Yourself” and head to step 4 in the Google Tag Manager Server Container Section
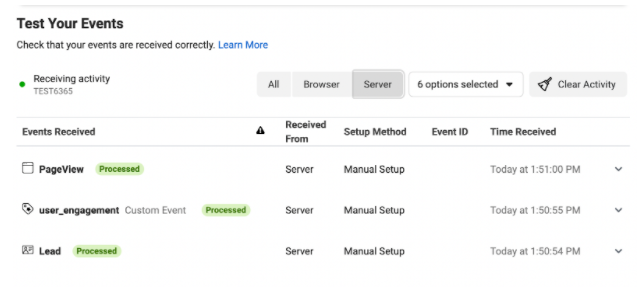
- Once your access Conversions API token has been successfully added, you now will want to test your setup.
- To test your CAPI (conversions API) you will head over to test events located in your Events Manager, and you will select the TEST ID on the right-hand side.
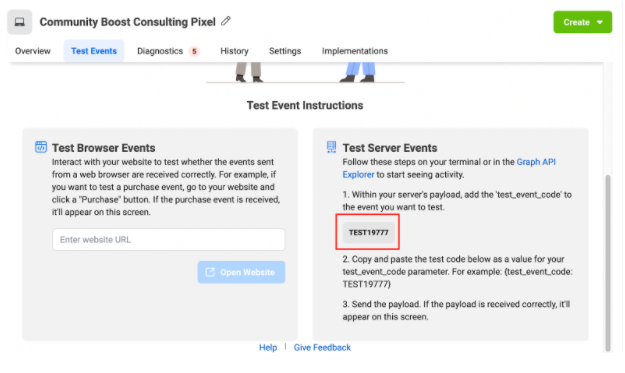 If your tracking was a success you should see your events firing and reading “server” under (received from).